Category Archives: Tutorial

[Tutorial] How to pause your game in GameMaker

Adding the ability to pause is an easy way to polish your game. It make your game feel more like a “real” game. Luckily GameMaker makes pausing games very easy.

There are two major ways to pause your game. One is to create a globalvar called “paused” or something similar, and wrap all of your step code (except the step code on your pause controller) in a check that looks like this:

if(!paused)
{
    //Step code goes here
}

Your pause button object would then take a click and set paused to true, stopping all the step code.

Personally, I feel that that is ugly, and hard to maintain. I do not like solutions which involve adding the same boilerplate code to everything. My preference is to use the instance_deactivate_all function to handle pausing for me.

To do this, you need to set a global which we’ll call gamePaused to true:

globalvar gamePaused
gamePaused = false;

Create a pause button object with a pause button sprite set to it’s default sprite. Add the following code to the step event:

if (global.gamePaused == false && mouse_check_button_pressed(mb_left) && position_meeting(mouse_x,mouse_y,pauseButtonObject))
{
    instance_deactivate_all(true);
    global.gamePaused = true;
    sprite_index = playButtonSprite;
}
else if (global.gamePaused == true && mouse_check_button_pressed(mb_left) && position_meeting(mouse_x,mouse_y,pauseButtonObject))
{
    instance_activate_all();
    global.gamePaused = false;
    sprite_index = pauseButtonSprite;
}

This checks to see if the game is paused. If it isn’t, and the left mouse button is pressed, and it is pressed over the pause button, deactivate everything but the pause button, set the gamePaused variable to true and change the sprite to a play button. If the game is paused, and the left mouse button is pressed, and it is pressed over the play button, reactivate everything, set paused to false and change the sprite back to the pause button sprite.

If you want to make a pause menu, create the instance in the first conditional.

Share Button
Asteroids Icon

[Tutorial] Asteroids

Goal

I cloned Asteroids in GameMaker Studio, to complete the Hexagons monthly challenge on OneGameAMonth. Graphics were made in Aseprite, sounds were pulled from OpenGameArt.

I heavily commented the source, so anyone who wants to learn some GML can follow along.

History

Asteroids was released by Atari in 1979. It was a massive hit for them. Game play is pretty simple. You pilot a small ship, which you fly around on a screen filled with asteroids. Shooting an asteroid causes it to break apart into a couple of smaller asteroids. That process happens twice. The final, tiny asteroids are destroyed when shot. Occasionally an alien saucer flies by and shoots at you.

Asteroids has a unique game fell. The style of movement is based on a lot of vector math. Coding it in ASM, like the original developers did was probably pretty difficult. Luckily, modern tools make that kind of thing trivial, so I leaned on GameMaker Studio to figure out the calculations for me, and just played with the numbers.

Details

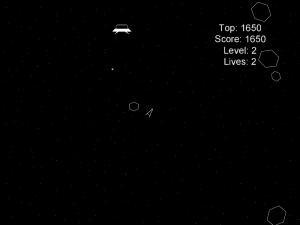
Asteroids Gameplay

Asteroids Gameplay

I drew the sprites by hand with Aseprite. None of them (with the exception of the invincible ship sprite) are animated. I let GameMaker handle sprite rotation for me, rather than trying to animate it myself. Most of the code involved is stored as a GML script. There are a few places I used drag and drop, but mostly because I had a couple of one-offs that would’ve resulted several scripts which were one line long, and not reused anywhere else. In those cases I opted to just use DnD. I think that’s the only real, legitimate cast to use the DnD interface. I try to use it sparingly, because it is nowhere near as powerful as GML.

You can get the source here, and play a live demo here.

Share Button
Brick Breaker 1GAM Icon

[Tutorial] Game Boy Style Breakout

Goal

I’m cloning Breakout, at a Game Boy resolution, with a Game Boy color palette for two reasons.

  1. To have something to submit to GBJam 3
  2. To fulfill the “Resolution” monthly challenge at 1GAM.

Graphics will be made in Aseprite, coding will be done in GameMaker Studio. Sounds will be pulled from OpenGameArt, because I don’t have time to make them.

History

Breakout was created by Atari in 1976 by Nolan Bushnell, Steve Wozniak, and Steve Bristow. Breakout was created around the concept of trying to make Pong into a single player game. Breakout has been ported to just about every language and system you can imagine, including an actual Game Boy port called Alleyway.

Details

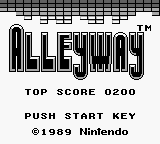
Alleyway Title

Alleyway Title

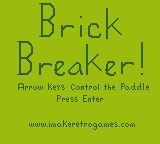
Brick Breaker Title

Brick Breaker Title

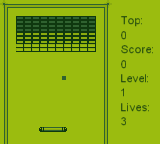
I duplicated the layout of the Alleyway for my GBJam entry. I titled it Brick Breaker. Like my last project, it’s written in GML. No drag and drop methods are used. Some of the code is a little ugly, because I wrote it in great haste. I made a mistake with the timing of GBJam and though it began a week later than it actually did. Because of that, I did not have time to polish the game, or track any sounds in Famitracker.

Alleyway

Alleyway

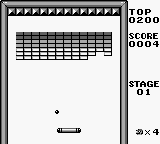
Brick Breaker Game Play

Brick Breaker Game Play

All the graphics were made by me, in Aseprite, using the Game Boy palette that ships with the software. I obeyed the original Game Boy restrictions on sprite sizes and sprites per line. My graphics are based on, but not a clone of, the graphics from Alleyway.

You can grab the source here, and see a live demo here.

The source is messy, but pretty well commented. Following the comments, it should be pretty obvious how everything works. I may clean this example up one day, but for now, if you have questions, contact me and I’ll answer them ASAP.


Share Button
pong

[Tutorial] 30 Minute Pong

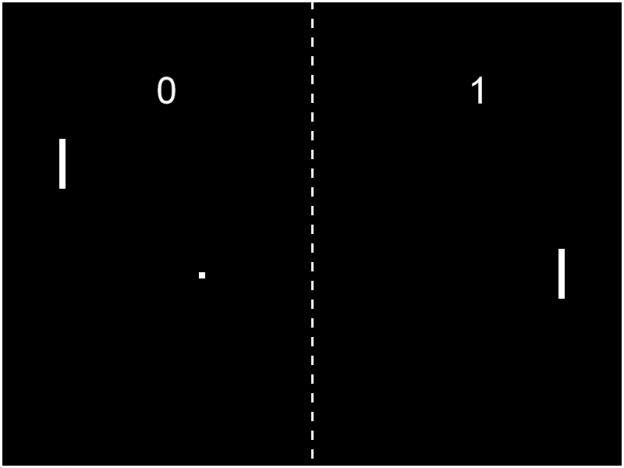
Pong is one of the oldest arcade games there is. Pong was released in 1972 by Atari Games. It’s almost old enough to be my dad. I first played Pong when I was about 8 years old. At that point I was very familiar with NES and SNES games, so I was not very impressed with Pong. I had no historical context and didn’t realize that had it not been for Pong, more or less launching the videogame industry, that my precious NES and SNES might not even exist!

Pong was written by one man named Allan Alcorn, as a training exercise to learn how to make games. I’ve recreated it in GameMaker Studio as a lesson in simple GML programming. I use no drag and drop techniques at all in the recreation. Pong is so simple, that this tutorial can easily be followed in 30 minutes.

You can get the source here, and play a live demo here.

All of the scripting is well commented and should be pretty easy to follow. You’ll notice that each room only has one object. I make an invisible master object and have it initialize everything else where I want it. I do that, because it’s more precise than trying to drag objects around in the room GUI (though that GUI is pretty great if you’re trying to make a platform game).

This is the most complicated piece of code in the entire project. It’s located in the ballControlScript script.

//if the ball hits a paddle, have it bounce off.
//Determine the angle by where the ball hit the paddle.

if(place_meeting(x,y,playerPaddleObject))
{
direction = radtodeg(arctan2(playerPaddleObject.y – playerPaddleObject.y, playerPaddleObject.x – (playerPaddleObject.x – 50)) – arctan2(y – playerPaddleObject.y, x – (playerPaddleObject.x – 50)));
speed++;
audio_play_sound(beep, 10, false);

} else if(place_meeting(x,y,enemyPaddleObject))
{
direction = radtodeg(arctan2(enemyPaddleObject.y – enemyPaddleObject.y, enemyPaddleObject.x – (enemyPaddleObject.x + 50)) – arctan2(y – enemyPaddleObject.y, x – (enemyPaddleObject.x + 50))) + 180;
speed++;
audio_play_sound(beep, 10, false);
}

In the original Pong, the paddle was broken up into 8 sections. Which section the ball hit on the paddle determined what angle it would bounce off at. I was capable of a smoother system. The script above uses some trigonometry tricks to make a triangle between three points. The ball. the center of the paddle and a point 50 units horizontally behind the paddle. I calculated the angle based on that. You can adjust how sharply you can return the ball by making that 50 a smaller number.

Share Button